UAE Shops - Established in 2002
عربى


Frioock
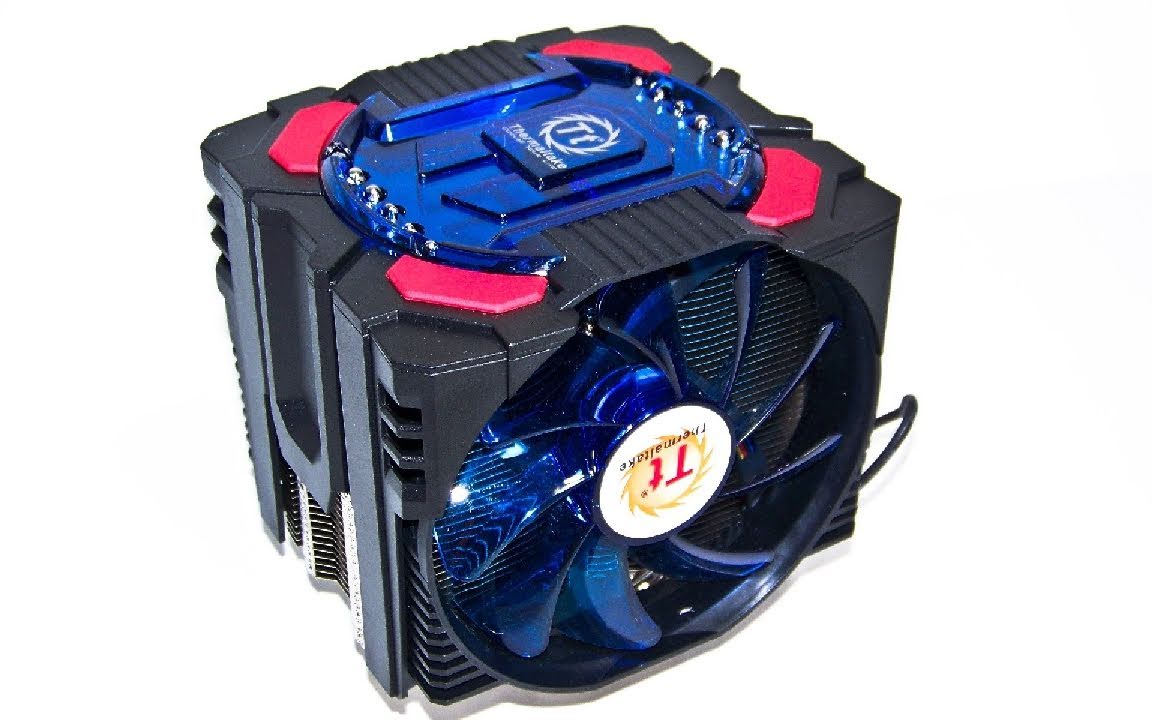
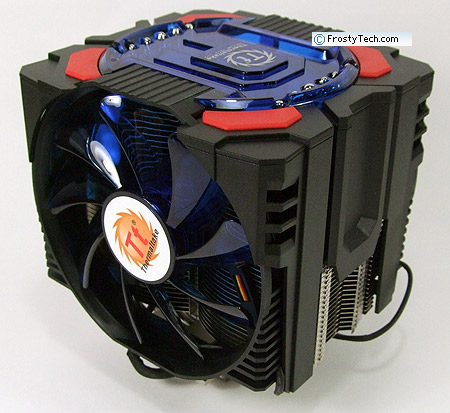
Detailed Feature – Ultimate Overclocking Thermal Structure Design, support up to 240W. – Integrated Module for Dual 130mm VR™ OC Fan and the dazzling Cover. – Universal Socket Compatibility & Accessory Package. Dimension Air Flow Chart Installation Guide Intel Motherboard Installation Step 1 Step 2 Before installing the CPU cooler onto the motherboard, you need to remove the fan module. As the arrows in the picture show, first pull the fixation levers carefully apart and then lift the fan module to the top. Now remove the protective tape from the cooler bottom. Use a screwdriver to attach the spring-screws to the cooler bottom. Step 3 Step 4 Now use the Thermaltake universal back-plate and install it onto the backside of your motherboard. In the next step install the four black plastic nuts from the front of the motherboard onto the screws of the back-plate. Step 5 Step 6 Now fix the retention module onto the black nuts and install the metal nuts on top of the screws to fix the retention module. It’s time to apply the bundled thermal paste. Step 7 Step 8 To fix the CPU cooler to the motherboard, use a screw driver and install the spring screws tightly. Now put the fan module onto the heat-sink and make sure it is installed tightly. Step 9 In the final step, plug the fans’ power cord into the corresponding power connector on the motherboard. AMD Motherboard Installation Step 1 Step 2 Before installing CPU cooler onto Motherboard, you need to remove fan cover. As the arrow in the picture, pull out two sides of fan cover and then lift it up. First remove the protective tape from the cooler bottom, and then use a screwdriver to attach the spring-screws to the cooler bottom. Step 3 Step 4 Again use a screwdriver in order to remove the pre-installed retention module and back-plate from the motherboard. Now use the Thermaltake universal back-plate and install it onto the backside of your motherboard. Step 5 Step 6 In the next step, install the four black plastic nuts from the front of the motherboard onto the screws of the back-plate. Now fix the AMD processor retention module onto the black nuts. Step 7 Step 8 Install the metal nuts on top of the screws to fix the retention module and apply the bundled thermal paste. To fix the CPU cooler to the motherboard use a screw driver and install the spring screws tightly. Step 9 Step 10 Now put fan cover onto the heat-sink and make sure it is installed tightly. In the final step plug the fans’ power cords into the corresponding power connectors on the motherboard. Product Description Detailed Feature – Ultimate Overclocking Thermal Structure Design, support up to 240W. – Integrated Module for Dual 130mm VR™ OC Fan and the dazzling Cover. – Universal Socket Compatibility & Accessory Package. Dimension Air Flow Chart Installation Guide Intel Motherboard Installation Step 1 Step 2 Before installing the CPU cooler onto the motherboard, you need to remove the fan module. As the arrows in the picture show, first pull the fixation levers carefully apart and then lift the fan module to the top. Now remove the protective tape from the cooler bottom. Use a screwdriver to attach the spring-screws to the cooler bottom. Step 3 Step 4 Now use the Thermaltake universal back-plate and install it onto the backside of your motherboard. In the next step install the four black plastic nuts from the front of the motherboard onto the screws of the back-plate. Step 5 Step 6 Now fix the retention module onto the black nuts and install the metal nuts on top of the screws to fix the retention module. It’s time to apply the bundled thermal paste. Step 7 Step 8 To fix the CPU cooler to the motherboard, use a screw driver and install the spring screws tightly. Now put the fan module onto the heat-sink and make sure it is installed tightly. Step 9 In the final step, plug the fans’ power cord into the corresponding power connector on the motherboard. AMD Motherboard Installation Step 1 Step 2 Before installing CPU cooler onto Motherboard, you need to remove fan cover. As the arrow in the picture, pull out two sides of fan cover and then lift it up. First remove the protective tape from the cooler bottom, and then use a screwdriver to attach the spring-screws to the cooler bottom. Step 3 Step 4 Again use a screwdriver in order to remove the pre-installed retention module and back-plate from the motherboard. Now use the Thermaltake universal back-plate and install it onto the backside of your motherboard. Step 5 Step 6 In the next step, install the four black plastic nuts from the front of the motherboard onto the screws of the back-plate. Now fix the AMD processor retention module onto the black nuts. Step 7 Step 8 Install the metal nuts on top of the screws to fix the retention module and apply the bundled thermal paste. To fix the CPU cooler to the motherboard use a screw driver and install the spring screws tightly. Step 9 Step 10 Now put fan cover onto the heat-sink and make sure it is installed tightly. In the final step plug the fans’ power cords into the corresponding power connectors on the motherboard.